


No. 1 Go to www.picmonkey.com in your browser.
No. 2 Upload your photo or graphic image (or use their preloaded images)
 |
| Click this image to get started at the PicMonkey site. You will be prompted to upload your image. |
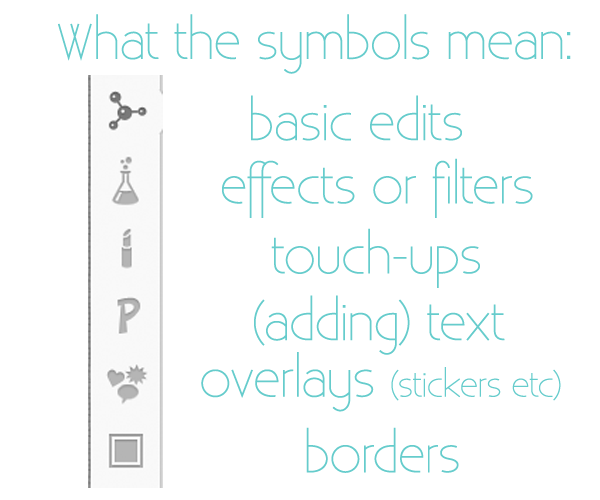
No. 3 Get familiar with your surroundings. Click on the different symbols to see what they will do for you.
No. 4 Once you are familiar with the options you can play around a bit. There is an UNDO button at the bottom left of your toolbox (I'm calling it a toolbox because it has all your options in it). You may also save or upload a new image here.
No. 5 What do you want to do? The sky is the limit! Did you check out all the fun things you can do to your photos? I love the "processes" available (very similar to Picnik eh?). Some of my favorites are Orton, Cross Process and Film Grain. What are yours?
 |
| Photo from Pick Your Plum |
No. 6 Let's make a photo pretty, just for fun. With your image uploaded, click on the bubbling test tube (effects) and scroll down to LOMO. When you click this what does it do to your photo? For me, it brightened and saturated the colors. LOVE IT! It also give you the option to blur the edge a little more or less. I tried several others, but had to show you Gritty too. It's so cool! Just have fun for now! When you are finished and want to save, click on SAVE and you will get the chance to save your image in the size you want with the correct label (name the pic).


We will will be sharing and showing you plenty more PicMonkey stuff...so stay tuned! Holla!
Sarah says: "PicMonkey should be called QuickMonkey!"
PicMonkey is FREE, but they now offer "Royale" options for a small yearly fee.


I think your link is wrong. It does not take me there....something about a domain being for sale.
ReplyDeleteThank you Princess! I fixed it...it was that silly auto link thing that did it to me. Have a lovely day!
DeleteYAY!! It is! Thank you very much for this tutorial. I am already going through picnik withdrawls. ~grins~
ReplyDeleteThanks so much for introducing me to PicMonkey, I look forward to future tutorials. I read your blog in my Reader but seldom comment. I made sure to today as part of Operation Speak Out http://creatingpaperdreams.blogspot.com/2012/03/operation-speak-out.html :)
ReplyDeleteIve GOT to try this! Looks like fun! Or at least a good way to lose a couple of hours!
ReplyDeletehoping that they add the collages in soon! great program otherwise!
ReplyDeleteThis is a great link! Thanks for sharing.
ReplyDeleteLove that Gritty look! :-)
ReplyDeleteI click on the photo to upload a pic, but it doesnt do anything!! what should I do?! :(
ReplyDeleteHi! Are you going to the PicMonkey site first? It could possibly be a browser thing...what are you using? Firefox or Safari are working for me...I'm sure Chrome is good. Let me know. Email me at sarah at blogguidebook dot com.
Delete