


We haven't been updating this blog, but we wanted to let you know how much we enjoyed it throughout the years.
We will leave it up indefinitely so you can still have access to the tutorials etc.
Lyndsay is living in Utah with her lovely family and is still creative and enjoying a busy life.
Sarah lives in Missouri with her family...is homeschooling and creating a new business idea.
Blogging has changed so much in the past few years, we are no longer able to keep up with all platforms
and possibilities! Good luck to everyone out there!
Lastly, The Blog Guidebook is available for sale if anyone is interested. Thanks again!
Bloggy Help:


PicMonkey App - Yes, it's Free. Yes, It's Cool.
Downloading the PicMonkey app was one of the smartest things I did in January. It's free and it makes your images look so much better before you post them on Instagram. Your IG feed can be so pretty...it's all about your style. Some folks love the pale colors, more white in an image, some love lots of color like aqua or pink. Whatever your style, you can enhance your photos using this free app. Works for iOS and Android.
We've always loved PicMonkey online, it's our go to tool when not able to use Photoshop. When they released their app we jumped on it, like a monkey. Monkey. LOL.
There's also a cool thing called their "hub" where you can save your images in their cloud. Which is brilliant if you don't want to clutter up your phone storage. To use the hub you have to have a ROYAL account which is about $4.95 per month, but also allows you to use all the features of their editing program (which you only use online so you don't have to download or install any pesky software/programs).
Here's a few ideas of what you can do.
Would love to see your edited photos or images...leave a link in the messages to your pics.
We've always loved PicMonkey online, it's our go to tool when not able to use Photoshop. When they released their app we jumped on it, like a monkey. Monkey. LOL.
There's also a cool thing called their "hub" where you can save your images in their cloud. Which is brilliant if you don't want to clutter up your phone storage. To use the hub you have to have a ROYAL account which is about $4.95 per month, but also allows you to use all the features of their editing program (which you only use online so you don't have to download or install any pesky software/programs).
Here's a few ideas of what you can do.
 |
| Before |
 |
| After |
 |
| Before |
 |
| After |
Would love to see your edited photos or images...leave a link in the messages to your pics.
Link In Profile
There's a nifty little site called Link In Profile that can help you add more than one link to your Instagram account. It's not free but if you are a blogger/instagrammer making a few bucks on the web, then you can probably afford $10 a month for this treat.
Basically you use Link In Profile as a storage source for the links you want readers to go to from your Instagram account. You would keep your main link in your profile as usual, but when that is clicked it would go to an unlimited scrolling page featuring all your links with a heading and an image.
Isn't that cool?
Do you know why Instagram doesn't allow clickable links in your posts?
You cannot add a clickable link to an Instagram post. Instagram removed this feature due to the high level of spam posts and affiliate marketing posts that were being published on the platform. Or so they said. The bottom line is they want to get paid, so if you are willing to pay for an ad you can get a clickable post. Of course, we don't want Instagram to turn into Pinterest, so that's ok.
If you don't want to pay $10 per month (after the free trial period), I suggest Link My Photos.
LinkMy.Photos
provides an ideal landing page for your Instagram profile link. Your
followers will be taken to a photo feed with all your clickable
Instagram photos, so even your previous website and YouTube links from
older photos remain relevant. You’ll also get meaningful metrics for how
many followers are viewing your photos and clicking through to your
links.
LinkMy.Photos offers a free plan for
your most recent 3 linkable photos, and inexpensive plans for unlimited
photos and multiple accounts.
Do you have a secret way to add links to Instagram? We'd love to hear your ideas!
Blog of the Week - The Minimalists
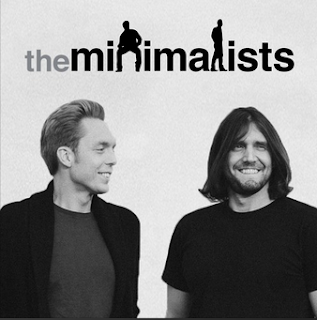
Because Christmas is in a few days and everyone is hurrying to buy stuff for their families and friends, I found this blog very uplifting and it made so much sense to me. I watched this documentary on Netflix the other day while I was sick and I felt like, I'm on the right path. I just need to be reminded why I moved us to this small house!
Check out The Minimalists blog, it's black and white, it's clean, it's minimal. You'll feel good.
Probably due to the cold weather and we've all been fighting some kind of illness, this house feels cramped and chilly...upstairs is totally warm and toasty (we're calling it Italy - do you know what reference that is from?)...and I keep imagining a large rambling house that has roaring fireplaces in every room...LOL. That's not very minimalist is it?
I love that Josh and Ryan aren't really selling anything, I mean, you can buy their book, but you can accept their philosophy for FREE. Ask yourself simple questions about why you do what you do, why you buy what you don't need...it's almost too simple to be real.
They've got great podcasts you can listen to for inspiration...I say do it! It's so easy to start thinking differently, you might be able start living differently too. Less really is more.
Hugs and Happy Holidays to you all if I don't get back on here before the New Year!
Subscribe to:
Posts (Atom)


